Project Purpose
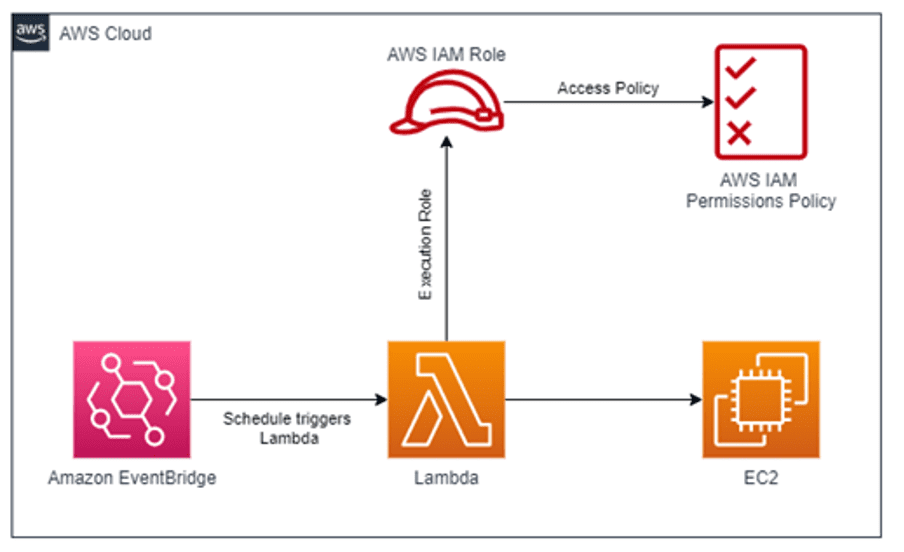
The objective is to enhance resource utilization and cost savings by automatically halting and initiating designated EC2 instances at prearranged intervals.
Solution
The creation of two Lambda functions and two CloudWatch event rules is necessary. The Lambda functions with the appropriate IAM roles according to the event rules. Modifying the cron expression in the CloudWatch event schedule is required to enable automatic scheduling. The EC2 instances should also be tagged with “key=Instance Schedule” and “value=Yes/True.”
AWS components involved
Lambda function — A computing service that allows users to execute programs without the need to set up or manage servers.
IAM —With the help of this managed service, AWS resource access can be effectively and securely managed.
CloudWatch Log group — This service allows you to utilize application and custom log files for monitoring and troubleshooting system and application issues. You can monitor your logs in near real-time for specific patterns using CloudWatch Logs.
CloudWatch Event Rules — In this scenario, a rule can consist of an event pattern and a schedule expression, triggering the rule based on the defined schedule and events that match the specified pattern.
Prerequisites
1. Have an active Amazon Web Services (AWS) account.
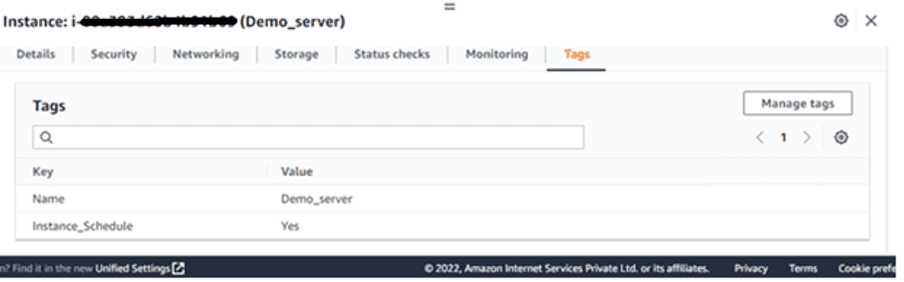
2. A running EC2 instance with tags.
Tagging Instances
Note: Every instance that needs to be started/stopped automatically has to be tagged, as seen in the image below.
Steps to auto start/stop AWS EC2 instances using AWS Lambda
1. Create an IAM Role and Policy that allows the Lambda function to stop and start EC2 instances.
2. To stop/start EC2 instances, create Lambda functions.
3. Testing Lambda functions.
4. Set up CloudWatch Event rules that trigger Lambda functions.
Steps Walkthrough
Create IAM role for Lambda
To manage the lifecycles of the EC2 instance, such as starting/stopping, the Lambda function must first be given an IAM role. The actions listed below must be followed to create an IAM role:
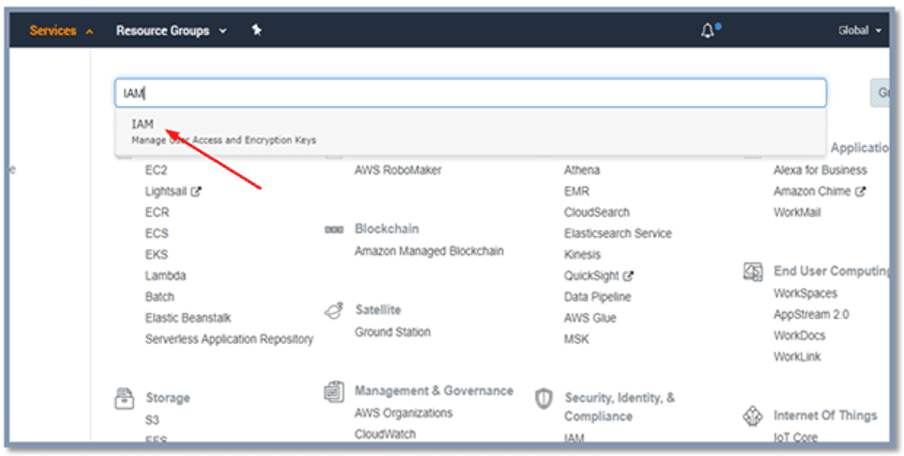
- Click IAM under Services in the AWS dashboard.
2. Navigate to the left-side navigation panel, locate and click “Roles,” and then select “Create role.”
3. Choose Lambda from the list of AWS Services.
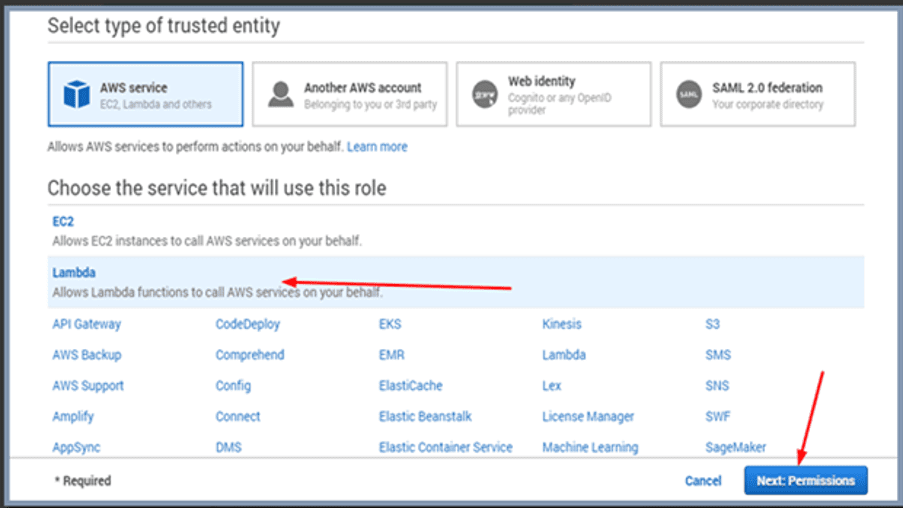
4. Click Next: Permission
5. Now, you need to click on “Create policy” to proceed. This action will open a new window. (We’ll establish a brand-new, unique policy for our Lambda function here.)

6. Choose the JSON tab. Remove the default code and add paste below JSON data.
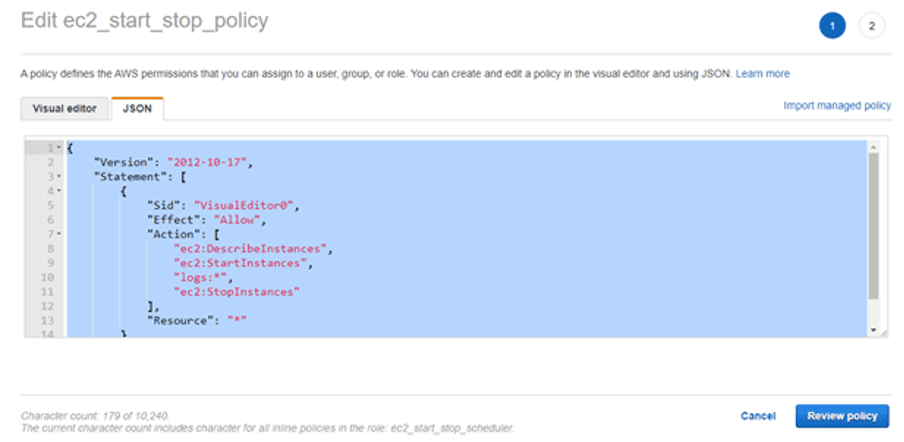
7. Select Review Policy. Once you have provided a description for the policy, named “ec2_start_stop_policy,” proceed by clicking on create policy.
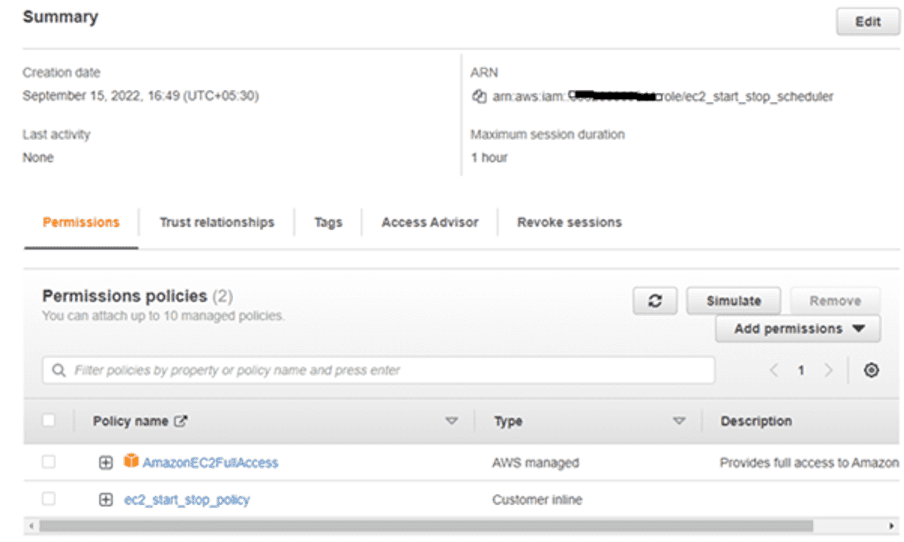
8. Switch back to the previous tab where we were in the process of creating the Role.
9. In this section, you can search for and select the recently created policy, “ec2_start_stop_policy.”
10. Press Next: tags, followed by Next: review. On the review page, input the role name as “ec2_start_stop_policy” and briefly describe the role.
11. Next, select Create role. A new role with EC2 start/stop permissions has been created.
Create Lambda functions that start/stop EC2 instances
· Develop a Lambda function to stop instances. Following steps need to be followed:
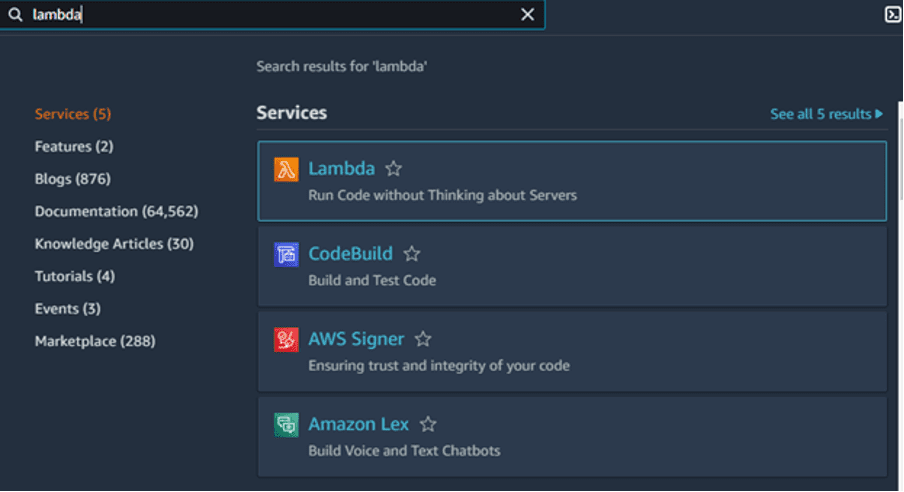
- Select Services and then Lambda
2. After selecting Create new function, select Author from scratch.

3. Put the function stop_instances under the basic Information tab and select Python 3.7 as the runtime.
4. To expand, select Choose or Create an execution role.
5. After choosing “Use an Existing Role” in the Execution role section and selecting the role we created in the previous step called ec2_start_stop_scheduler, click the “Create function” button.
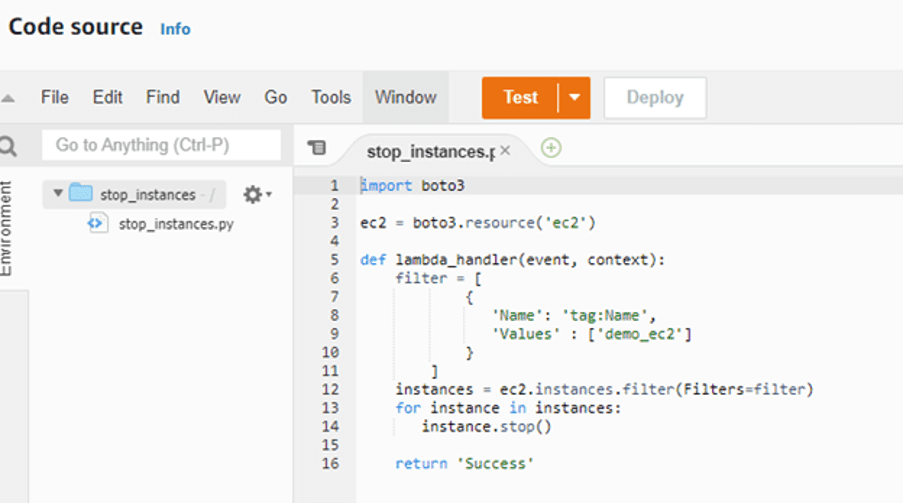
6. Scroll down within the Lambda Designer interface to locate the “Function Code” section.
7. Under the function code, in lambda_function.py, you’ll find an inline editor. After deleting the file’s content, paste the following code.
8. Scroll down under Baisc options and enter 30 Seconds in Time out.
9. Click Save in the top right corner and leave the other settings as they are.
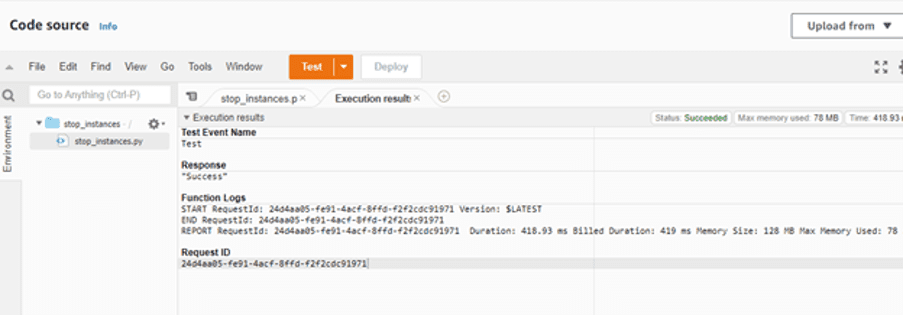
· Testing stop_instances Lambda function
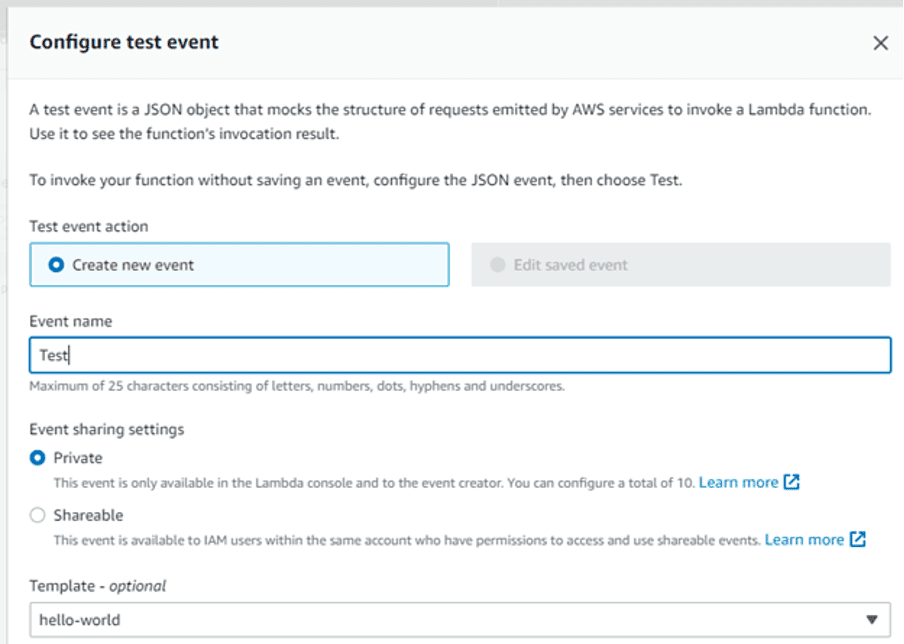
- It will prompt you to configure a test event the first time. Select Hello World as the event template or provide any other name for the event in the Event Name field.
2. After selecting the test event of your choice, click on the “Test” button. The output displayed should indicate “Execution result: succeeded(logs),” confirming the successful execution of your Lambda function. You can now check the EC2 console to verify that the tagged instance has indeed stopped.
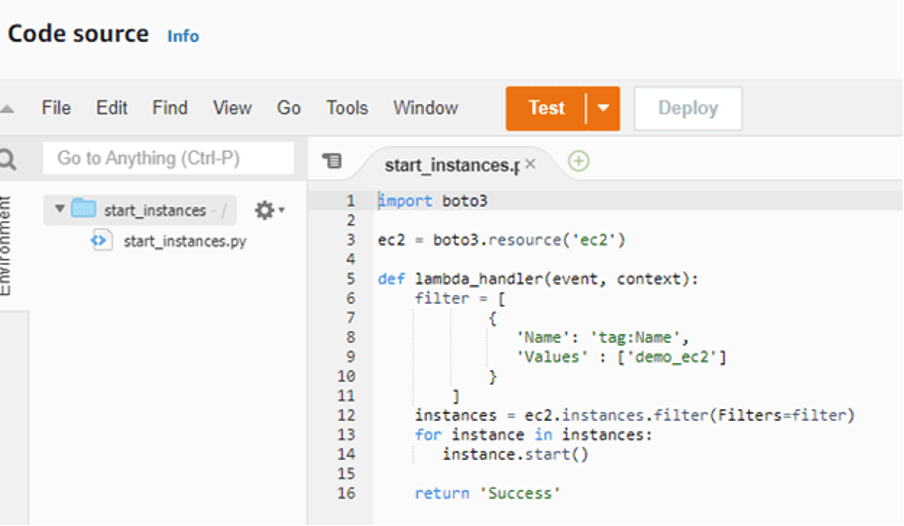
· Create a Lambda function to Start the Instance
1. Follow the same steps mentioned above for creating a Lambda function for a stop instance. Select the function name= start_instances.
2. Use the following lambda code.
· Testing start_instances Lambda function
Follow the same steps as mentioned in stop_instances lambda function testing.
To activate the Lambda function, add an Amazon EventBridge scheduled rule.
· Scheduling auto-stop Ec2 using CloudWatch events
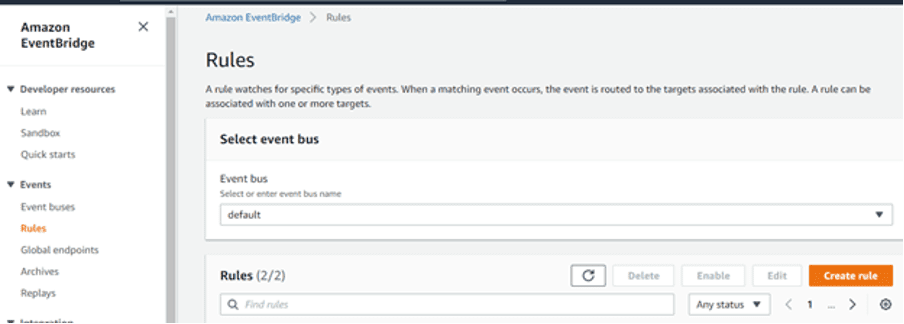
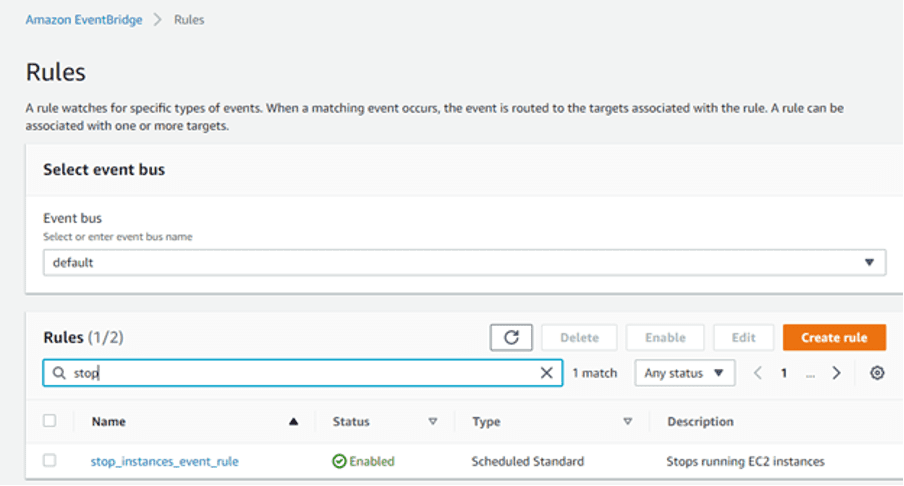
- Open the Eventbridge console. Select Create rule.
2. Enter a name for the rule, for example, “ stop_instances_event_rule”.
3. Select Schedule in the rule type in Define pattern.

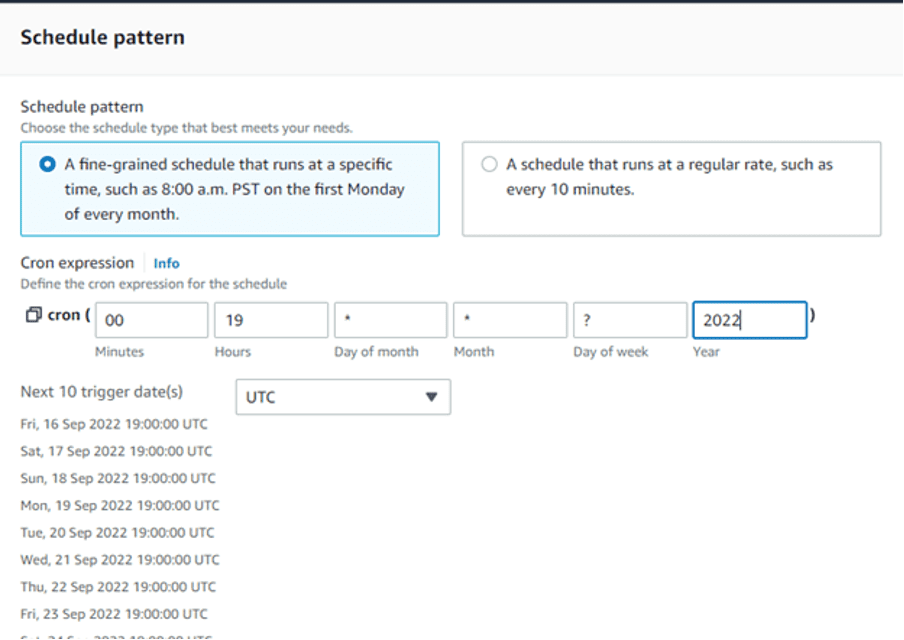
4. Given that cron expressions are evaluated in UTC, enter an expression telling Lambda when to stop your instances. Ensure that the phrase is changed to reflect your selected time zone. Put in a cron expression to schedule an action every day at 7 o’clock.
5. Choose the Lambda function from the Target drop-down menu in select targets.
6. Select the “stop_instances” function to stop EC2 instances as your Function option.
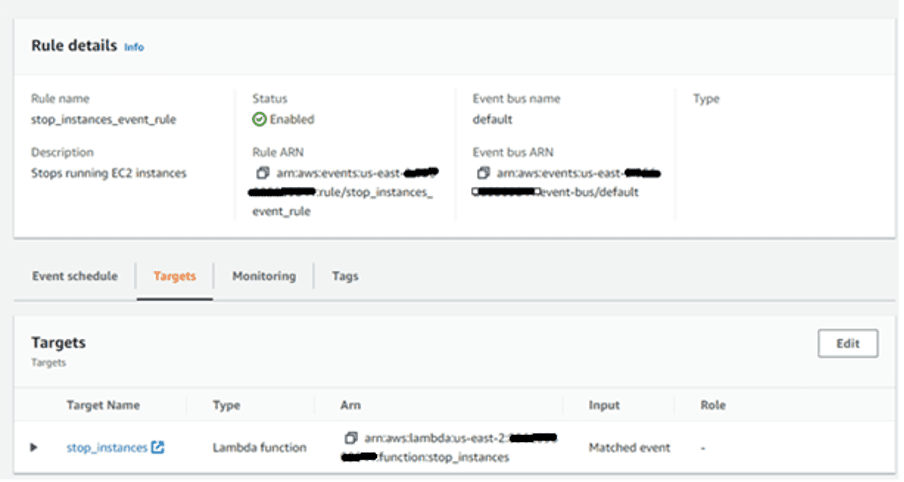
7. After you scroll down, click Create.
· Scheduling auto start using CloudWatch events
Repeat steps 1 through 8 from above to establish a rule to start your EC2 instances. Make the following adjustments:
– Name your rule, e.g., “start instances event rule”.
– Put an expression in the Cron expression box in step 5 to tell Lambda when to start your instances.
– Select the function that launches your EC2 instances as “start_instances” in step 7 under Function.

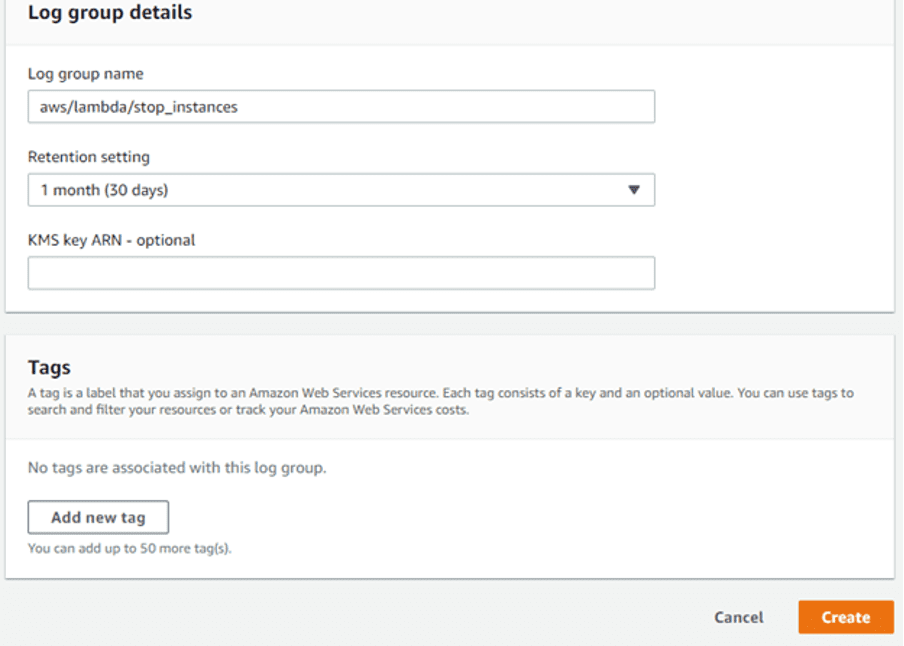
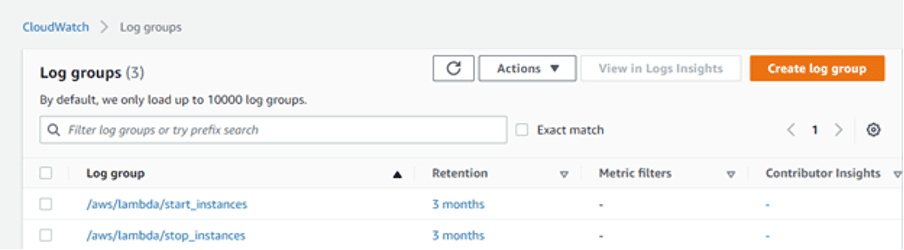
Create CloudWatch Log Group for both Lambda functions.
- Open the CloudWatch console. Select Log groups from the navigation pane.
2. Choose to Create log group after choosing Actions.
3. After providing a name for the log group, select Create log group.
4. Repeat these steps to create a log group for the start lambada function and a log group for both lambda functions created.
To view log data
1. Open the CloudWatch console. Select Log Groups from the navigation pane.
2. For Log Groups, choose the log group to view the streams.
3. In the list of log groups, choose the name of the log group you want to view.
4. Choose the name of the log stream you want to view in the list of log streams.
Clean-up
Delete EC2 Instance, IAM Role, IAM Policy, Lambda functions, CloudWatch event rule, and CloudWatch log group.Post navigation